Easy 3-Minute Guide to Workpiece Thickness Measurement with a Laser Displacement Sensor
- Share
- publisher
- Zoe
- Issue Time
- Sep 28,2024
Summary
Learn how to measure workpiece thickness using two laser displacement sensors in 3 minutes, including the working principle of laser displacement sensors and key considerations when measuring thickness.

Easy 3-Minute Guide to Workpiece Thickness Measurement with a Laser Displacement Sensor

Laser Displacement Sensor
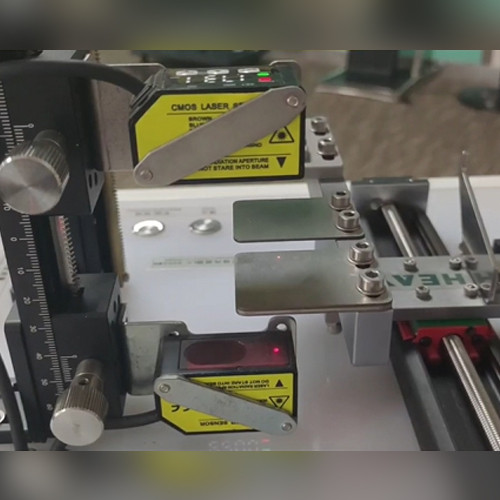
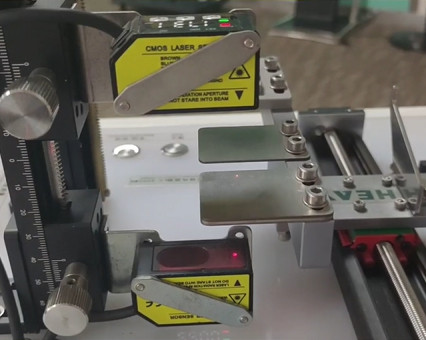
Laser displacement sensors are widely used non-contact measurement tools that work by emitting laser beams and measuring the time delay or phase difference of the reflected light to accurately determine the distance between the object and the sensor. When measuring workpiece thickness, a triangulation method is typically used.
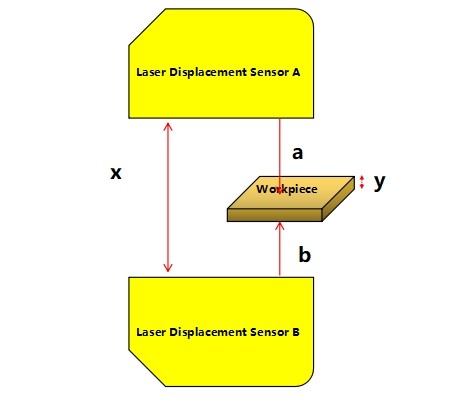
As Shown in the Diagram
The formula for calculating the workpiece thickness is:
𝑦 = 𝑥 − 𝑎 − 𝑏
Where:
▪️ 𝑥 is the fixed distance between the two laser displacement sensors;
▪️ 𝑎 is the distance from Sensor A to the workpiece surface;
▪️ 𝑏 is the distance from Sensor B to the workpiece surface;
▪️ 𝑦 is the thickness of the workpiece.

Once the two laser displacement sensors are installed, the fixed distance 𝑥 is set, and the workpiece is placed within the measurement range of the sensors. Sensor A and Sensor B will measure the distances 𝑎 and 𝑏 from the sensors to the workpiece surface, respectively.
Using the formula 𝑦 = 𝑥 − 𝑎 − 𝑏, the thickness 𝑦 of the workpiece can be calculated. It is important to note that slight horizontal movements of the workpiece do not affect the thickness measurement 𝑦.
Additionally, since laser displacement sensors typically do not directly output distance values but instead output analog signals proportional to the distance, a PLC (Programmable Logic Controller) is required to read the sensor's output signals. Through proper calibration and calculations, the signals are then converted into actual distance values, allowing for the thickness measurement to be completed.
Key points to note during measurement:
1️⃣ Sensor Calibration: Sensors must be calibrated before measurement to ensure accuracy.
2️⃣ Environmental Impact: Environmental factors such as temperature fluctuations and vibrations can affect the measurement results, so it's advisable to conduct measurements in a stable environment.
3️⃣ Workpiece Surface: The material, color, and smoothness of the workpiece surface can also influence the measurement precision.
Advantages of Using Laser Displacement Sensors for Thickness Measurement
✅ Non-contact Measurement: It does not cause any physical damage to the workpiece.
✅ High Precision: The measurement accuracy can reach the micron level. For instance, DADISICK's DK-GFL-Z Series laser displacement sensors have a repeatability of up to 10 μm, while the DK-GFL-G Series offers a resolution as fine as 2 μm.
✅ Fast Measurement: The measurement process is quick and efficient, ideal for high-speed production environments.
Application Scenarios: Laser displacement sensors are widely used in thickness measurement in industrial production, including metal sheets, plastic films, and paper. In particular, laser displacement sensors are highly favored by manufacturers in the production of lithium battery electrodes.(Click to learn more about lithium battery electrode measurement.)
Recommended Laser Displacement Sensors
|
Sensing Distance
|
Resolution
|
Linearity |
Output
|
|
30 mm (±4)
|
2 µm
|
±0.1%f.s. (f.s.=8mm) |
NPN / PNP
Analog RS485 |
|
50 mm (±10)
|
5 µm
|
±0.1%f.5. (f.s.=20mm) |
|
|
85 mm (±20)
|
10 µm
|
±0.1%f.8.(f.s.=40mm) | |
120 mm (±60) | 30 µm | ±0.1%f.s.(f.s.=120mm) | |
250 mm (±150) | 75 µm | ±0.3%f.s.(f.s.=300nm) | |
|
Sensing Distance
|
Repeatability
|
Linearity |
Output
|
|
30 mm (±5)
|
10 µm
|
±0.1%F.S. |
Analog / RS485
|
|
50 mm (±15)
|
30 µm
|
NPN / Analog / RS485
|
|
|
100 mm (±35)
|
70 µm
|
||
200 mm (±80) | 200 µm | ±0.2%F.S. | |
400 mm (±200) | 400 µm / 800 µm | ||

