In-depth Analysis: Principles, Applications, and Selection Key Points of Laser Distance Sensors and Laser Displacement Sensors
- Share
- publisher
- Zoe
- Issue Time
- Aug 31,2024
Summary
Want to know the fundamental differences between laser distance sensors and laser displacement sensors? We provide a detailed comparison of their measurement principles (ToF, phase-shift, triangulation), accuracy, measurement range, and application scenarios to help you easily make a selection.

The Rise and Development Trends of Optical Measurement Sensors
In fields such as manufacturing, precision instruments, biomedicine, and aerospace, the demand for measurement accuracy and efficiency is steadily increasing. Non-contact, digital, high-precision, and highly sensitive optical measurement sensors, especially laser distance sensors and laser displacement sensors, are providing more precise, efficient, and intelligent measurement solutions across various industries.
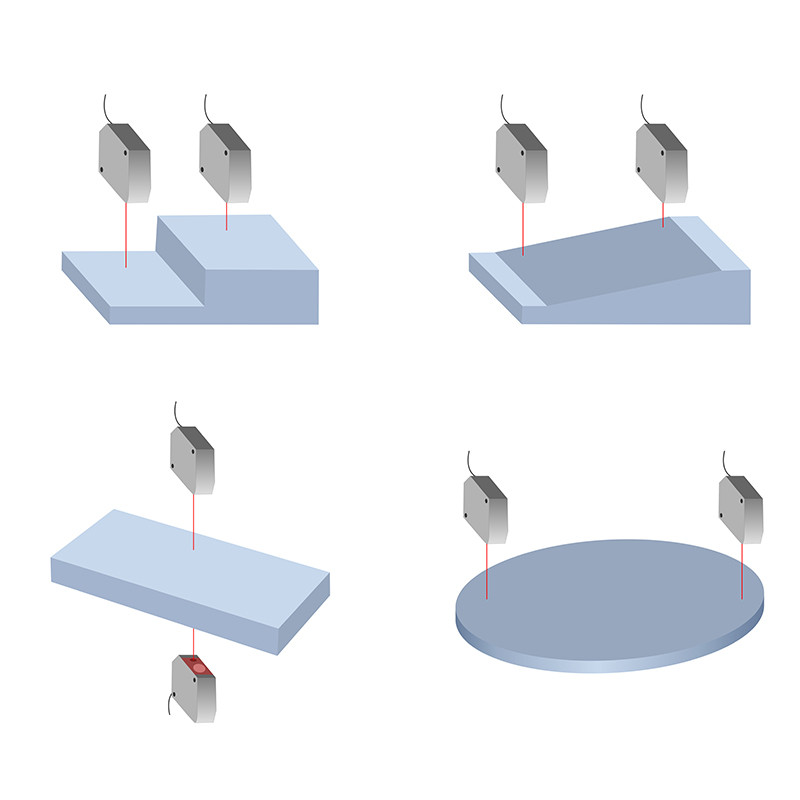
The Fundamentals and Classification of Laser Distance Measurement Technology
Based on the fundamental principles of laser measurement, the methods can be divided into the Time of Flight (ToF) method and the triangulation method. Among them, the Time of Flight method can be further categorized into the Pulse Method (ToF) and the Phase-Shift Method.
As shown in the diagram below.

Pulse Method (ToF): The Ideal Choice for Long-Distance and Large-Scale Measurement
Principle:
The Pulse Method (ToF) is based on measuring the time it takes for a laser pulse to travel from the emitter to the target and back to the receiver. A laser pulse is emitted, reflects off the target, and the time difference between emission and reception is recorded. Using the speed of light 𝑐 and the time difference 𝑡, the distance 𝑑 to the target can be calculated using the formula:
where 𝑑 is the distance to the target, 𝑐 is the speed of light (3 ×10^8 m/s), and 𝑡 is the round-trip time. The division by 2 accounts for the round-trip nature of the measurement.
NOTE: The speed of light in vacuum, commonly denoted c, is a universal physical constant that is exactly equal to 299,792,458 metres per second (approximately 300,000 kilometres per second; 186,000 miles per second; 671 million miles per hour).
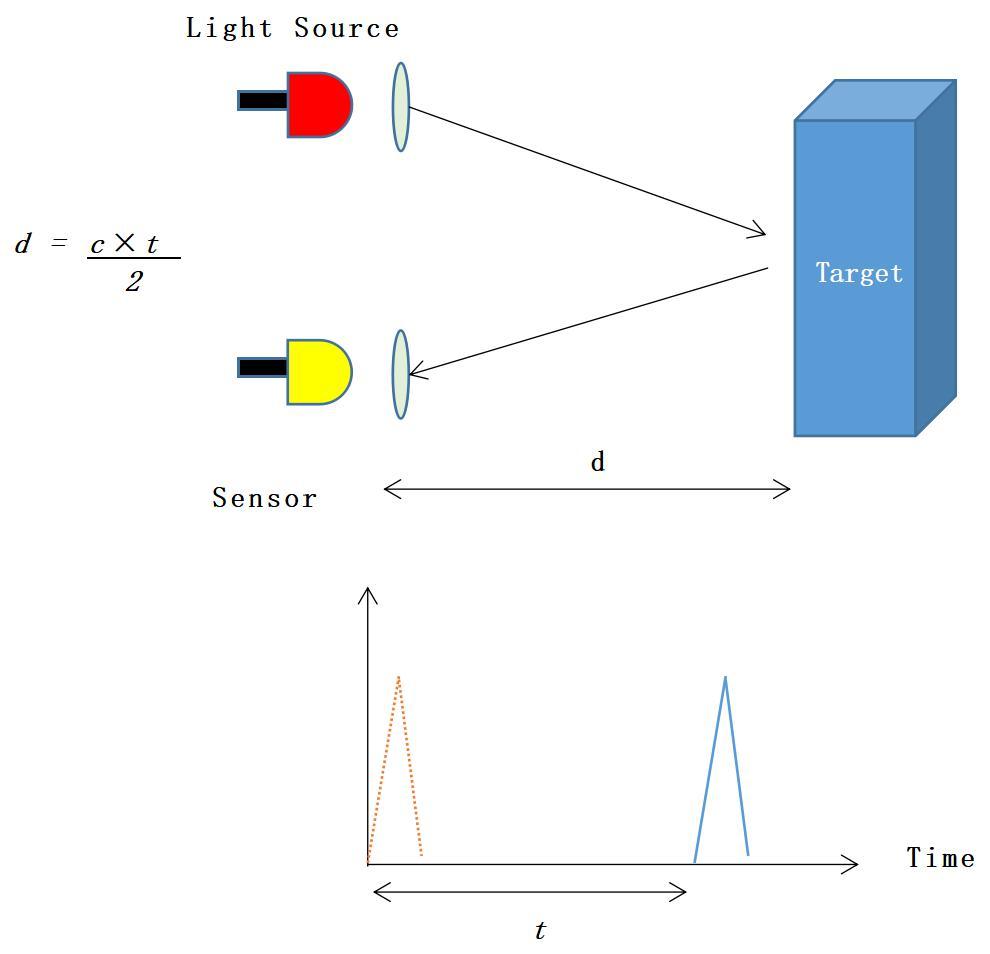
The pulse method (ToF) is especially suitable for applications requiring the measurement of long distances or large areas, such as drone mapping, 3D map construction, environmental monitoring (e.g., the vertical distribution of pollutants in the atmosphere), and obstacle detection and avoidance in autonomous vehicles.
LiDAR (Laser Detection and Ranging): In fields such as autonomous driving, robotic navigation, terrain mapping, and 3D modeling of buildings, LiDAR systems utilize the pulse method (ToF) to obtain high-precision 3D spatial information, providing critical data support for decision-making.
Aerospace: The pulse method (ToF) is also used for precise distance measurement between spacecraft and the ground or target objects, ensuring the safe execution of missions such as lander navigation and Mars rover exploration.
Phase-Shift Method: Reliable Technology for Medium and Short-Distance High-Precision Measurement
Principle:
The Phase-Shift Method involves modulating the laser beam and measuring the phase difference between the emitted and received signals to calculate distance. The laser beam is modulated as a sinusoidal wave, and the phase shift Δ𝜙 between the transmitted and reflected waves is measured. This phase shift is directly related to the distance to the target, and the distance 𝑑 can be calculated using the formula:
where 𝑑 is the distance to the target, 𝑐 is the speed of light (3 ×10^8 m/s), Δ𝜙 is the phase shift, and 𝑓 is the modulation frequency.
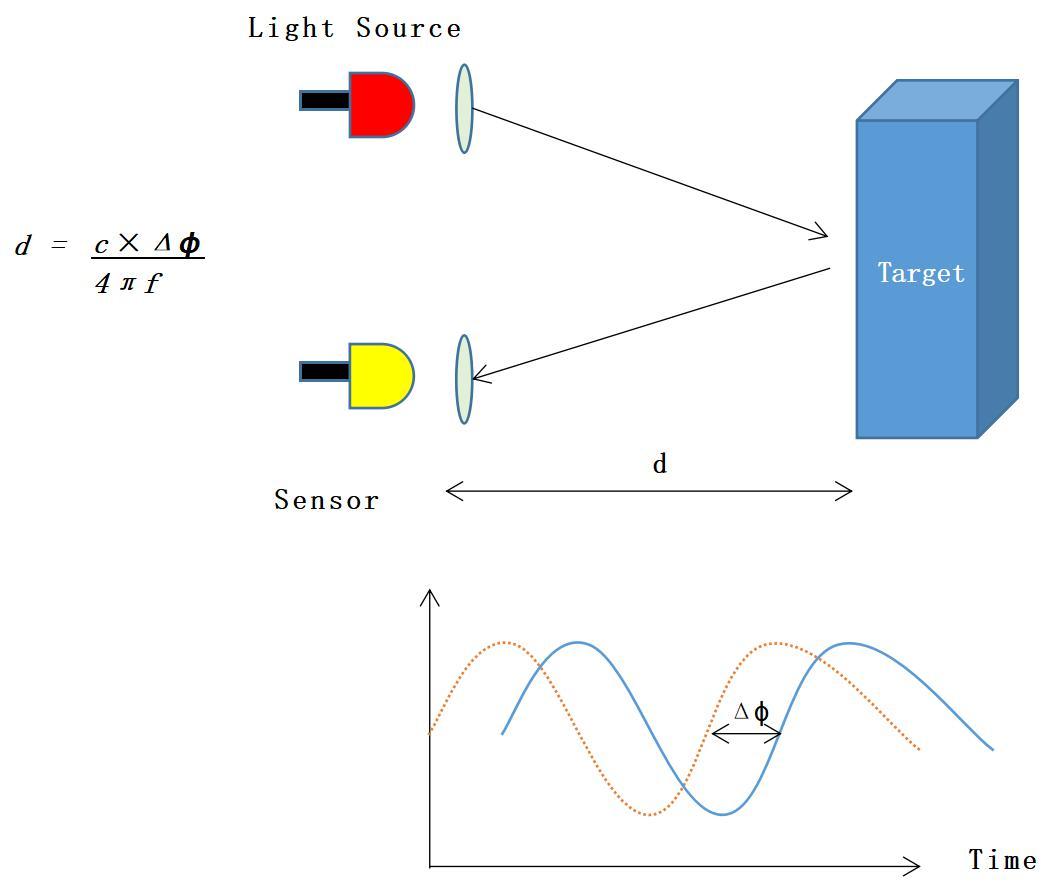
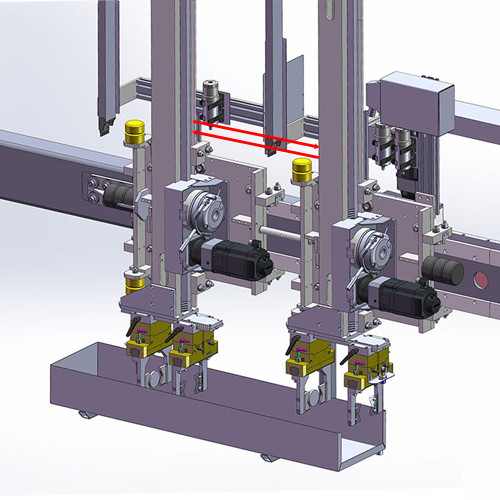
The phase-shift method provides higher measurement accuracy than the pulse method (ToF) at medium and short distances, making it an indispensable tool in industrial automation. For example, phase-shift laser sensors play a crucial role in precise positioning of robotic arms, alignment of parts on automated assembly lines, and precision machining in CNC machines.
Quality inspection: In manufacturing, phase-shift laser sensors are used to measure surface flatness, thickness, and small dimensional changes in products, aiding in quality control and process monitoring.
Scientific research: In fields like physics and materials science, the phase-shift method is used to study the microscopic structure and properties of materials, such as measuring thin film thickness and analyzing surface roughness.
Triangulation Method: A Precision Tool for Ultra-Short-Distance Measurement
Principle:
The Triangulation Method is based on geometric triangulation, where the known positions of the laser emitter and receiver, along with the reflected laser beam, form a triangle. The laser beam is emitted towards the target and reflected back to the receiver. By measuring the angular difference 𝜃 between the emitted and reflected beams and using the known baseline distance 𝐿 between the emitter and receiver, the distance 𝑑 to the target can be calculated using the formula:
where 𝐿 is the known baseline distance between the emitter and receiver, and 𝜃 is the angle of the reflected beam.
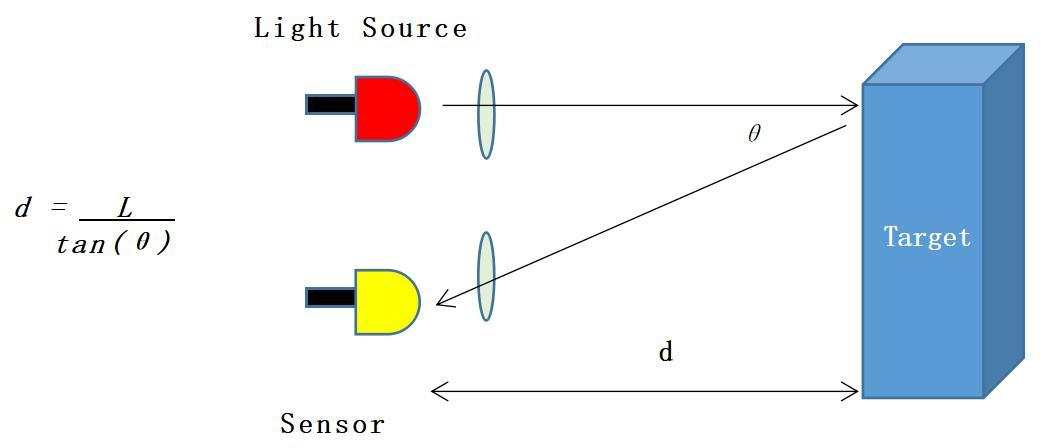
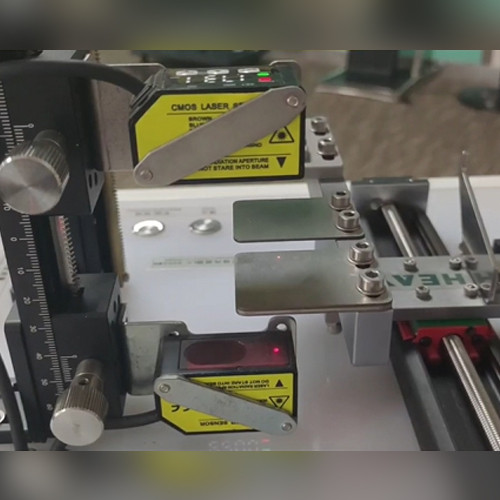
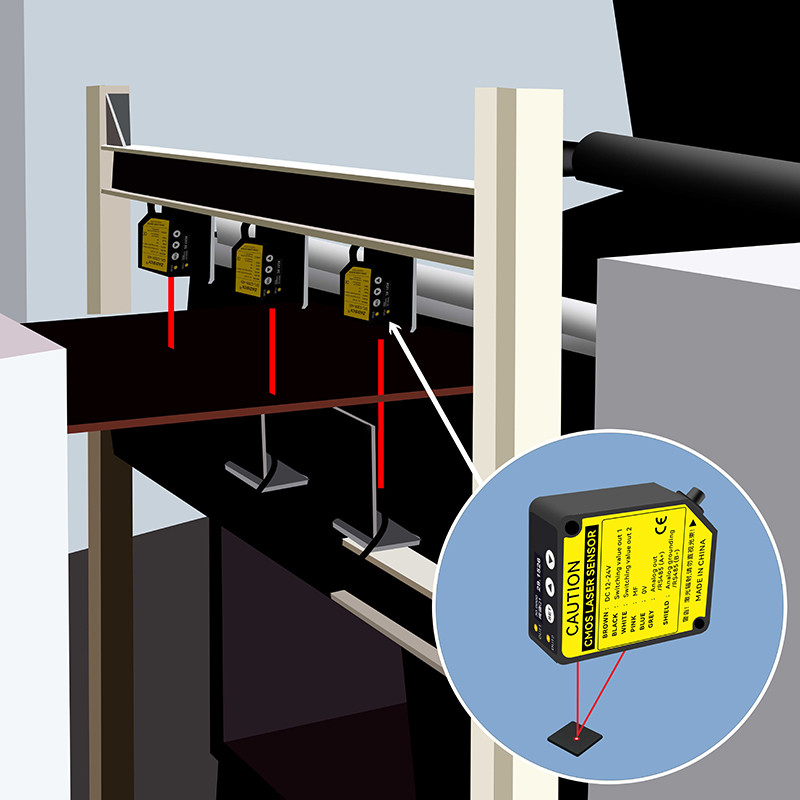
Triangulation is a geometric measurement method based on triangular relationships. In this method, a laser spot is projected onto the object to be measured, and the reflected light from the object is directed at a certain angle towards the CMOS sensor element. The position of the light spot on the CMOS line changes according to the distance of the object. In this way, even at very small distances, the distance to the object can be precisely determined.
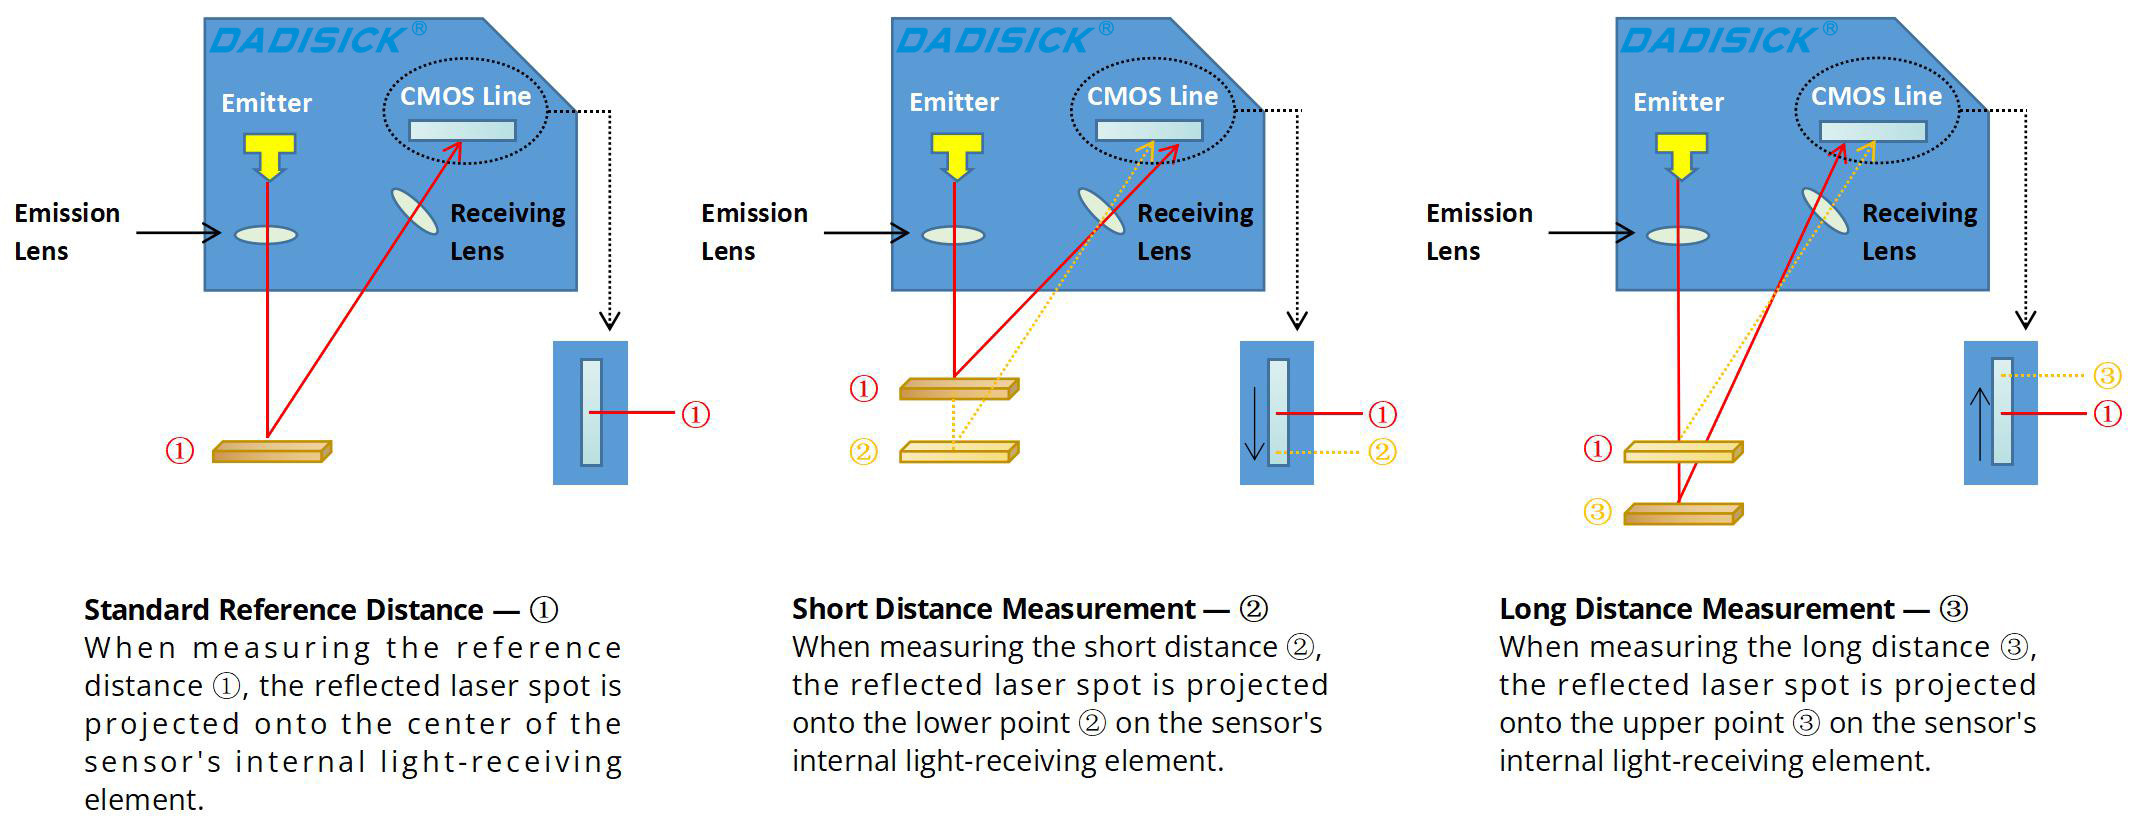
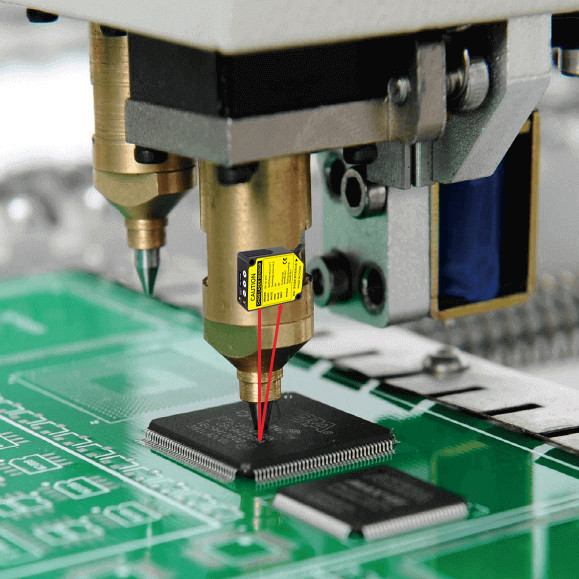
Ultra-short distance high-precision measurement: The triangulation method, known for its extremely high measurement accuracy and stability, is widely used in fields such as electronic component processing, semiconductor manufacturing, and precision machining. It can accurately measure small dimensional changes, such as line widths on chips and dimensional tolerances of components.
Automotive manufacturing: In the automotive manufacturing process, triangulation laser sensors are used for precise alignment in body welding, surface quality inspection before painting, and control of assembly accuracy of parts.
Robotics and automation: In robotic vision systems, laser sensors based on the triangulation principle are used for 3D reconstruction, posture estimation, and path planning, enhancing the intelligence of robots.
Solar photovoltaics: In the solar photovoltaic industry, triangulation laser sensors are used to detect surface flatness, cracks, and stains on photovoltaic panels, ensuring product quality and power generation efficiency.
Selection Key Points of Laser Distance Sensors and Displacement Sensors
Product | Laser Displacement Sensor | Laser Distance Sensor | ||
Series | DK-GFL-G Series | DK-GFL-Z Series | DK-GFL-Y Series | DK-DA-Y & DK-DB-Y Series |
Measurement technology | Triangulation Method | Time of Flight: Phase-Shift Method | ||
Measurement Range | 30 mm (±4); 50 mm (±10); 85 mm (±20); 120 mm (±60); 250 mm (±150) | 30 mm (±5); 50 mm (±15); 100 mm (±35); 200 mm (±80); 400 mm (±200); | 0.1 - 1 m; 0.1 - 2 m; 0.1 - 5 m; 0.1 - 10 m; 0.1 - 20 m; 0.1 - 50 m; | 0.2 - 10 m; 0.2 - 20 m; 0.2 - 30 m; 0.2 - 50 m; 0.2 - 100 m; |
Resolution | Min. 2 μm; Max. 75 μm | — | 1 mm | 1 mm |
Repeatability | — | Min. 10 μm, Max; 800 μm | — | — |
Laser type | Class ll, Wavelength: 655 nm | Class ll, Wavelength: 655 nm | Class ll, Wavelength: 655+10 nm | Class ll, Wavelength: 660±15 nm |
Protection Rating: | IP64 | IP60 | IP67 | IP67 |
Supported Interfaces | RS485 / Switch Output / Analog (4 to 20 mA or 0 to 5 V) | RS485 / Switch Output / Analog (4 to 20 mA or 0 to 5 V) | RS232 / RS485 / Switch Output / Analog (4 to 20 mA or 0 to 5 V) | |
Function | Mainly used to measure small displacement changes or surface position deviations of an object. It typically focuses on high-precision dynamic or static displacement relative to a reference point (e.g., vibration, deformation, flatness, etc.). | Focuses on measuring the absolute distance between two points (e.g., the straight-line distance from the sensor to an object). It is suitable for medium- to long-range static or slow-moving dynamic scenarios. | ||
Typical Applications | Industrial Inspection: • Measurement of component thickness, flatness, and roundness (e.g., bearings, chips). • Real-time quality control on production lines (e.g., detecting product dimensional deviations). | Surveying and Construction: • Terrain mapping, building height measurement. • Spatial distance calibration in indoor renovations. | ||
Dynamic Monitoring: • Mechanical vibration analysis (e.g., operational status of motors, turbines). • Material deformation testing (e.g., micro-movements in bridges and building structures). | Robotics and Autonomous Navigation: • Obstacle avoidance and navigation (e.g., robotic vacuum cleaners, drones). • Safety distance monitoring between vehicles. | |||
Precision Machining: • Monitoring tool wear in machine tools. • 3D scanning and surface profile reconstruction. | Security and Monitoring: • Perimeter protection (detecting intruder distance). • Speed measurement in sports events (e.g., athletics, racing). | |||
Measurement Target | Relative displacement changes (minute, dynamic) | Absolute distance (static or slow-moving dynamic) | ||
Accuracy | Micrometer to nanometer level | Millimeter to centimeter level | ||
Measurement Range | Short (typically a few millimeters to several meters) | Large (several meters to kilometers) | ||
Typical Scenarios | Industrial inspection, vibration analysis | Surveying, robotic navigation, security | ||
Documents
Technical Data Sheet
User Manual


